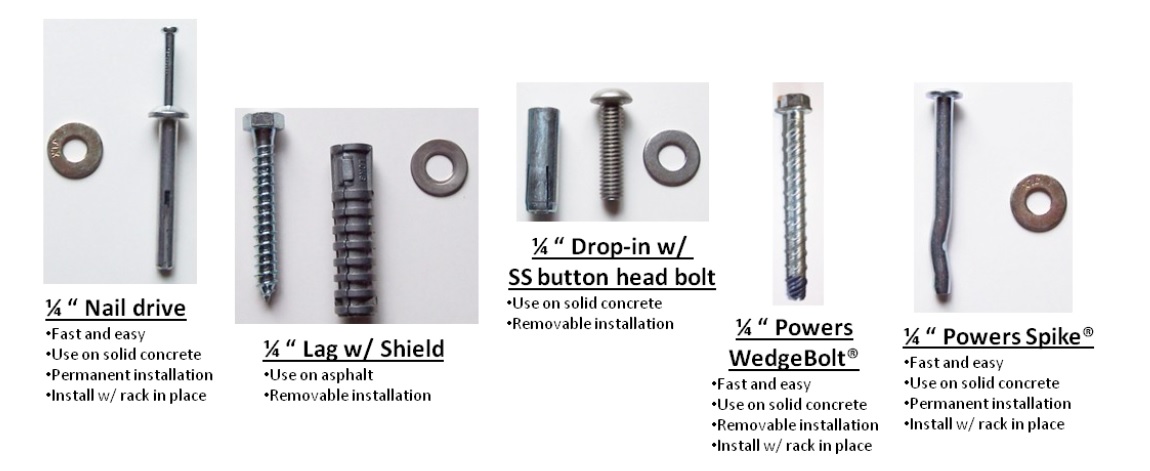
Required Tools
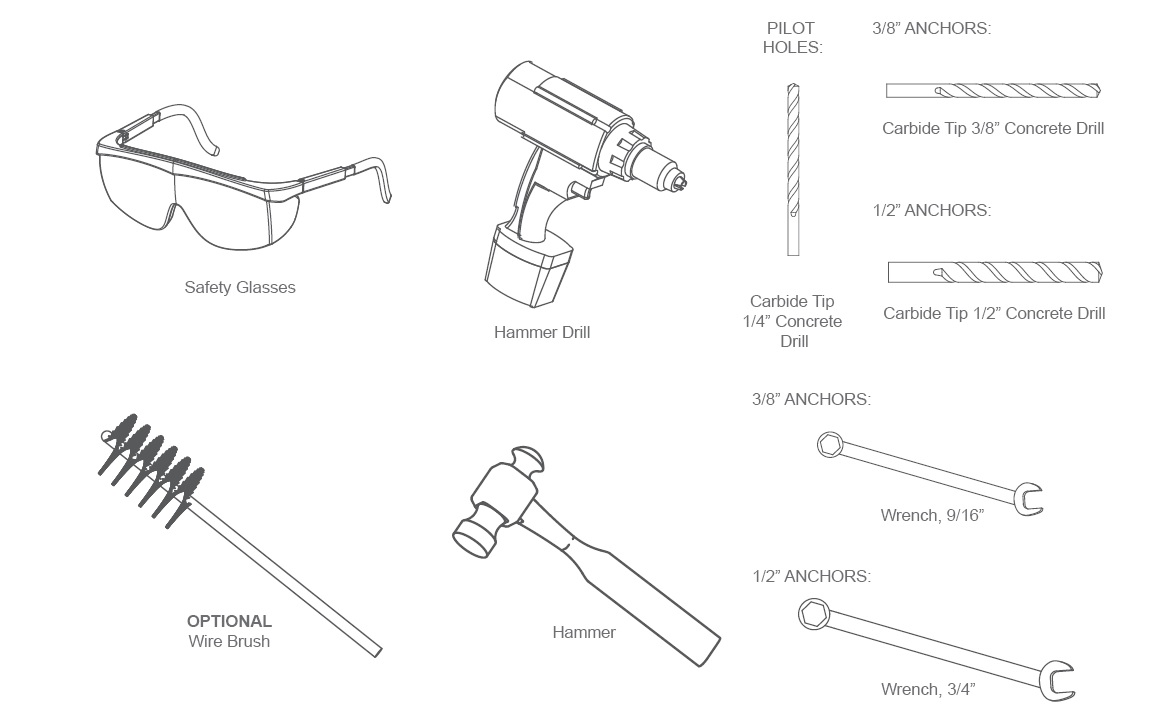
Required Accessories
Once you buy a product from us, we will provide delivery and installation guide services!
We can offer all the technical supports for installation of all our products.
We pay strict attention to accuracy and detail. More than just an installation.
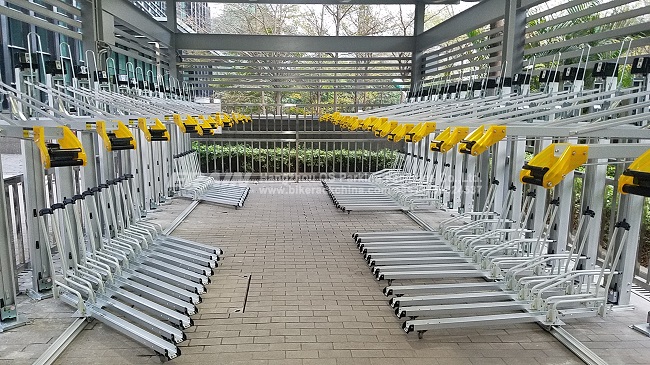
Installation Steps
1.Mark Holes
Set your bike rack in the location where you wish to install it. Use a pencil or center punch to mark hole locations on concrete using the bike rack feet as templates.
2.Drill Holes
For best results, use carbide tipped drill bits. Start with a 1/4” drill bit and hammer drill to drill a pilot hole on each installation mark.
For 3/8” anchors use a 3/8” drill bit to drill out the pilot holes to a min. 3” depth, and for 1/2” anchors use a 1/2” drill bit to drill out the pilot holes to a min. 3.5” depth.
3.Clean Holes
Clean the drilled hole with a wire brush and/or compressed air.
4.Set Rack and Level
Set rack so that holes in the mounting feet align with the holes drilled in Step 2. If the concrete surface is uneven use washers between the bike rack mounting plate and the concrete to level the rack.
5.Hammer in Anchors
Insert anchor through bike rack mounting plate hole and drive the anchor into the hole with a suitable hammer. Ensure a min. of 5/8” of the anchor protrudes above the mounting plate or mounting rail for the nut
6. Tighten Nuts
When all anchors are installed, install nuts and washers, then torque nuts to 25-30 ft-lbs for 3/8” anchors, and 50-60 ft-lbs for 1/2” anchors.
For more details of installing the double decker bike racks, please see the video below: